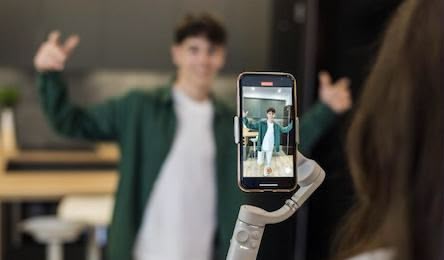
Picture yourself confidently in front of the camera, effortlessly delivering your course content.
It’s not just a dream anymore.
It can be your reality.
In this blog post, I will share some proven techniques to enhance your recording experience when creating training courses.
These time-tested tips will help you free up your mental energy, allowing you to focus more on delivering valuable content.
Than getting bogged down by technicalities and losing your flow.
Let’s make it happen!
Outline the video
👉 Before you outline, write down the top 3 to 5 questions a viewer will have after reading your lesson title. Use those questions to script just the first 20–30 seconds as a hook. Answer a key question quickly, set the destination, and then continue with your outline for the rest of the lesson. This tiny script greatly improves retention and prevents re‑takes.
If you’ve read my blog post on creating course content, you already know the power of mind mapping or outlining.
I’m a big fan of mind mapping the entire course, including the modules, lessons, subheadings, and key arguments in advance.
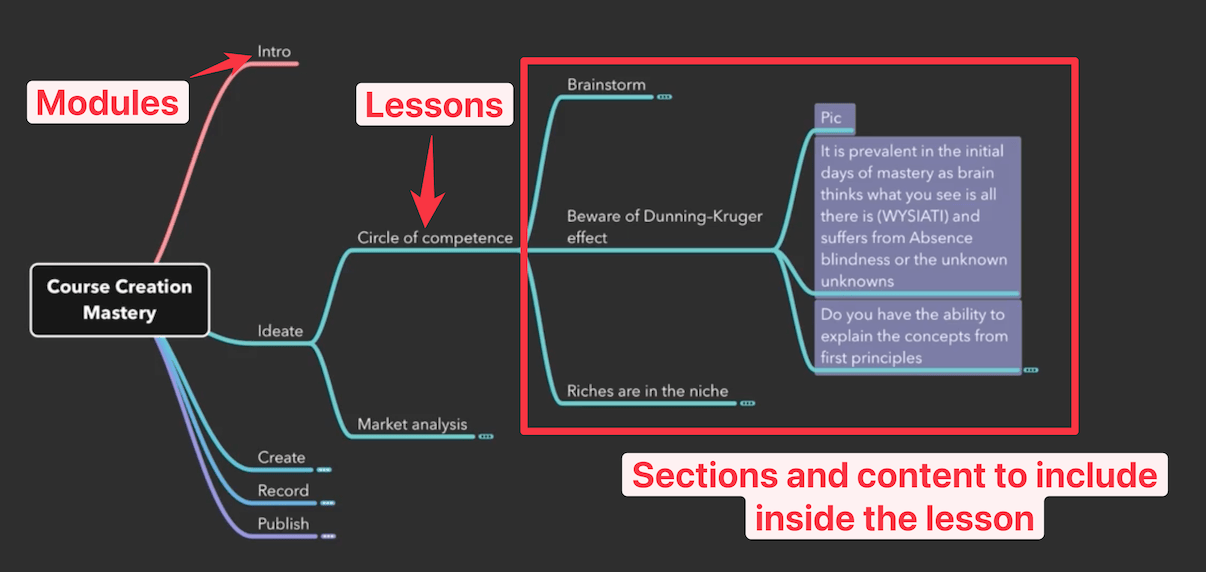
I will refine and optimize it as I go, and during the recording process, I’ll have the mind map or outline for each lesson on an additional monitor.
This serves as a helpful reference while recording the course.
Alternatively, you can consider scripting the course to deliver more value in less time. However, personally, I’m not a fan of using a script during the creation of course content as it can detract from maintaining eye contact with the audience.
Minimize the time gap between creation and recording
Have you ever found yourself struggling to remember key points while recording your course?
The secret to smooth, confident delivery might be simpler than you think: minimize the time gap between course creation and recording.
When you create your course curriculum, your ideas are fresh, your thoughts are organized, and your enthusiasm is at its peak.
Recording shortly after this phase ensures that the vibrancy and depth of your knowledge are captured authentically.
The more time that passes, the more you’ll need to refer to notes, leading to a disjointed delivery. Recording soon after creation keeps the flow natural and reduces dependency on prompts.
Tips for effective timing
- Batch the pipeline: Week 1 outline 2–3 lessons. Week 2 record them in one session so setup only happens once.
- Protect your daily morning 2-3 hours: It’s like a “creation block” free from notifications. Use it for outlines, hooks, and assets. Then record within 24–48 hours to preserve freshness.
- Schedule recording sessions close to planning: Plan your recording sessions soon after your course planning phase. This helps in maintaining the continuity and depth of your understanding.
- Use tools to stay organized: Leverage digital tools like Notion or mind maps. They’re not just for planning but also act as quick references during recording, ensuring you stay on track without losing the essence of spontaneity.
Remember, the key is to capture the freshness of your ideas. The closer you record after crafting your course content, the more naturally and effectively you’ll be able to communicate your insights.
The power of mental rehearsal
Imagine standing confidently in front of your camera, delivering your course content with ease and precision.

This isn’t just a dream – it can be your reality with mental rehearsal.
A study comparing different training approaches for Olympic athletes found that the group with 75% mental training and 25% physical training performed the best, indicating the value of mental rehearsal in enhancing performance.
To unlock your maximum creative potential, it is important to utilize the power of visualization and mental rehearsals. By engaging these techniques, you can activate specific neural pathways that will aid in enhancing your performance.
Visualize yourself presenting flawlessly before recording.
This creates confidence and prepares you to handle the recording calmly, like a rehearsal for your nerves.
When your content is firmly in mind, you can focus on delivery – improving your body language and intonation.
This confidence gives you creative freedom to experiment with presentation styles.
Eliminating recording frictions
Recording should be smooth and hassle-free.
However, often we encounter little bumps along the way, which I like to call ‘recording frictions’.
Before tackling these recording issues, start with one simple rule: keep it simple. Setting limits helps you focus and work faster.
👉 Give yourself just one hour to record each lesson, and plan everything else around this time limit – your equipment, scenes, editing, and how you present. This prevents you from getting distracted by fancy effects and helps you deliver more value in less time.
Now:
One of my favorite YouTubers, Matt D’Avella, demonstrates these techniques in a video where he is interviewed by Thomas Frank. He shares valuable insights on how to minimize friction in video creation.
Let’s tackle these head-on and smooth out your recording process.
Simplify your setup
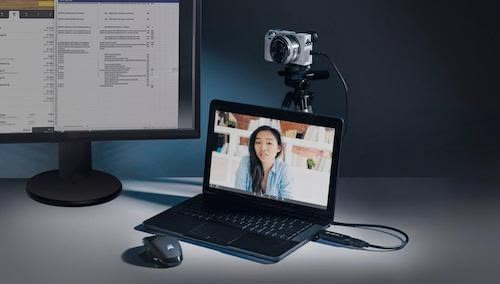
Think about having just one switch that turns on your camera, microphone, and lights – letting you start recording right away without messing with equipment.
If you’ve read my blog post on course creation hardware and use software like Camtasia or eCamm Live with an Elgato Camlink to record directly from your laptop, get yourself a USB hub. Connect all cables from your mic, Camlink, and laptop charger to this hub, then just plug the hub into your laptop.
This eliminates the need to deal with individual wires from each device and improves productivity. With just one device connected to your laptop, all the necessary gear for video recording will be ready to go.
This setup creates what I call a Minimum Viable Studio (MVS):
Let me explain:
Keep your camera on a tripod with pass-through power, lights and mic on a single power strip, and connect your camera directly to your computer with a Cam Link or equivalent.
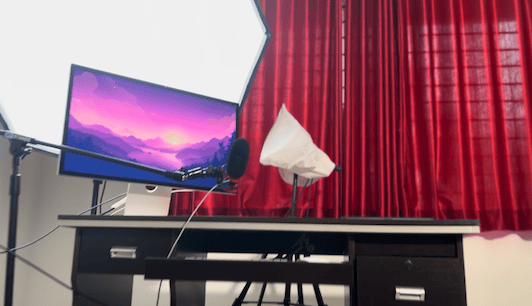
Cover the camera with a dust bag when not in use. When it’s time to record, just remove the bag, flip one switch, and you’re ready. No SD cards, no battery surprises, no cable mess!
This simple approach saves you time and helps you focus fully on recording. With a simple flick of a switch, you can unleash your creativity and engage your audience without any distractions or technical complications.
Continuous power and efficient storage
Keeping your camera in charge mode is a smart move to avoid the hassle of battery life concerns.
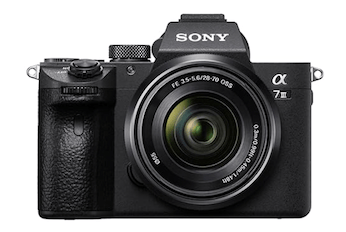
I personally use the Sony A7C mirrorless camera, which has a good battery life and the option to charge while recording.
However, when recording videos longer than 30 minutes, the camera may experience overheating issues.
To address this, simply take a 2-minute break in the middle of recording sessions to allow the camera to cool down. This break also provides an opportunity to renew your energy levels.
With this simple step, you can focus on your recording without any interruptions.
Additionally, direct recording to your PC is a game-changer(using Elgato Camlink) as it eliminates the need for constant memory card management and streamlines file transfers.
This means you can dedicate more time and energy to delivering great content instead of worrying about technicalities.
By optimizing your recording setup in these ways, you can ensure a smoother and more efficient recording session that allows your creativity and expertise to shine through.
Make the most of your screen space
Having dual screens for better visibility during your course recording can greatly enhance your experience.
By using a second monitor or an iPad, you can keep your course outline or notes within sight without them obstructing your view.

This allows you to seamlessly refer to your materials while maintaining focus on engaging with your audience.
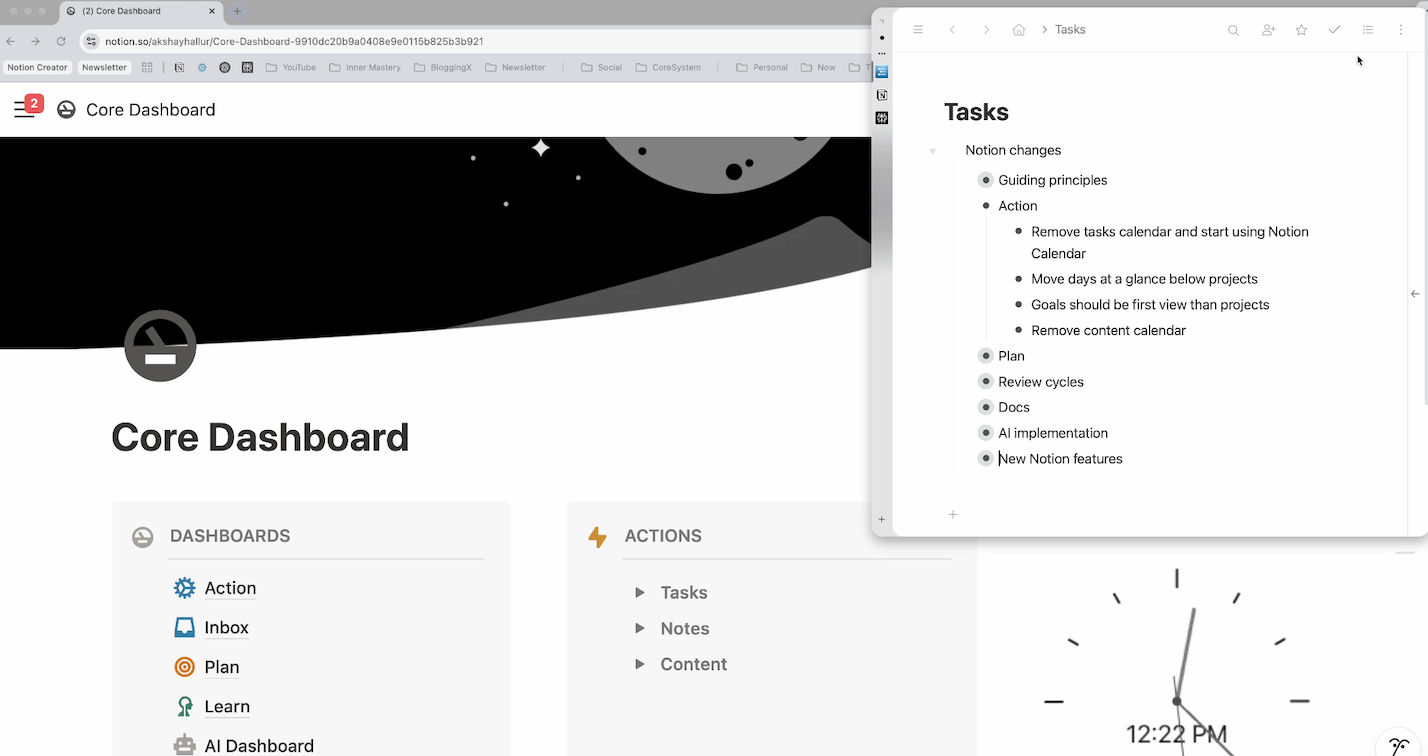
Another helpful tool is Slidepad, which provides extra screen real estate.
This is essential for effectively monitoring your recording and referencing your materials simultaneously.
With Slidepad, you can effortlessly navigate between different resources, ensuring a smooth and engaging recording session.
Easy pause and resume

When recording your course content, it is important not to feel pressured by the camera and the need to perform.
Therefore, having the flexibility to pause and resume the recording as needed, without having to reach for the camera right on your keyboard, is essential.
For example, if you are using good recording software like Ecamm Live, it comes with the ability to configure different hotkeys that you can press while recording.
This reduces a significant amount of time in post-processing.
When pausing and resuming your computer recording, it is crucial to have a camera with excellent battery life and the ability to run for extended periods without overheating.
This is incredibly useful for dealing with interruptions or simply taking a moment to gather your thoughts.
By eliminating these frictions, you set the stage for a more focused and efficient recording session, where your energy is spent on delivering great content, not on managing your recording setup.